Showing posts with label Dreadnought. Show all posts

Wednesday, September 25, 2019

Maton ERC90C Dreadnought cutaway acoustic.


I wrote this message to the upset owner of this beautiful Maton ERC90C Dreadnought cutaway acoustic guitar.

"I think the guitar has been over humidified in its case which may have had some residual moisture spilled in it, or a shower of rain in the open case.

The whole guitar has been over humidified resulting in expansion of most of the timber it is made from. I did some more measurements and geometry checks and found that the bridge area is 3+mm (under string tension) higher than it should be.

I've shaved the bridge and lowered the saddle by 1.5 mm so that the string height will be close to normal again.

The neck angle is within tolerance and does not justify a neck re-set. The hairline crack around the neck joint is the result of expansion of all the exposed wood in that area.

I'm going to leave the case open in the sun for a few days to ensure it is properly dry.

I'm going to remove the fingerboard and re-fair the neck to the sound hole then reattach the fingerboard, level and crown the frets. This was done on Andy's Maton with great results and also on an early Maton of another friend, the neck of which could not be removed. 

It deserves the right treatment."

Maton ERC90C Dreadnought cutaway acoustic.
Looks good right? Unplayable neck, the result of over humidification.
There was a distinct V in the finger board where the neck joins the body.

The hairline expansion cracks can be seen here.

...and here

More expansion cracking

... and here.

There was no way the neck joint had been compromised.
These lines are the result of timber expansion and contraction


Here I'm glueing a .5mm walnut veneer to the neck and sound board to
begin the process of re-fairing the neck and body surfaces to take the finger board.


Here the veneer is ready for beam sanding.
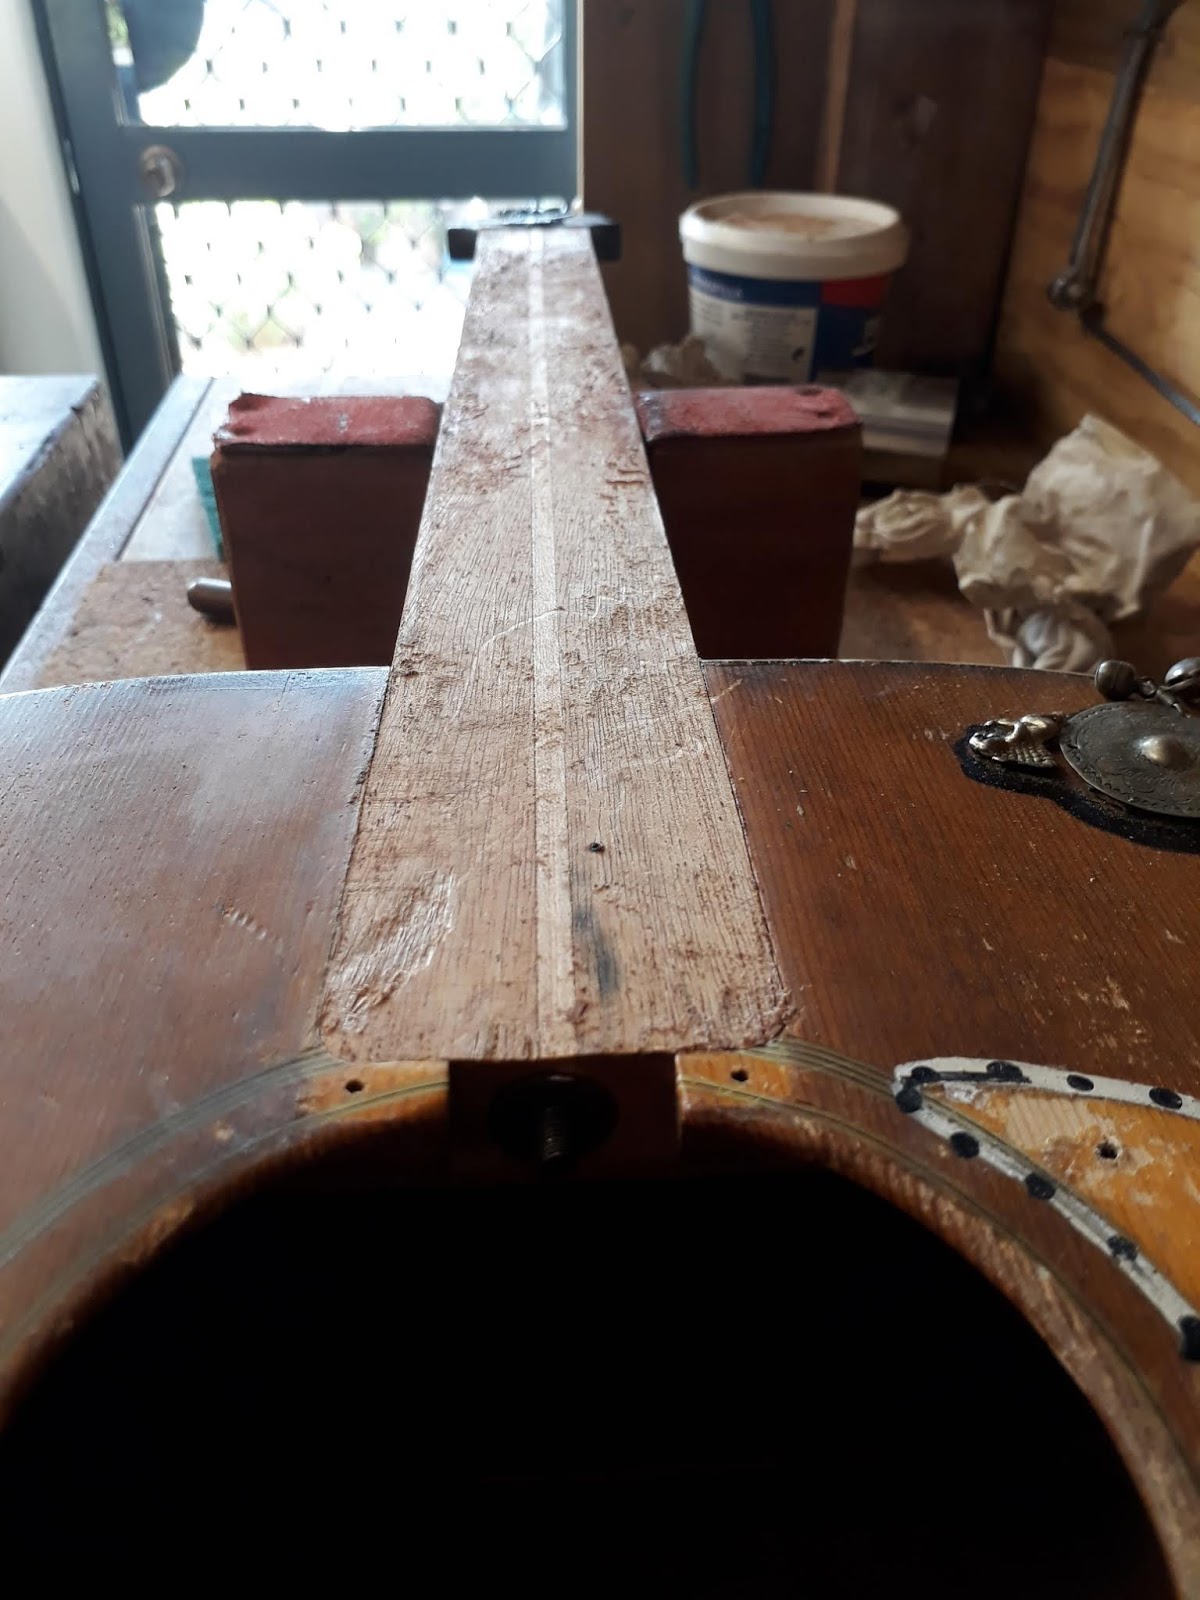
The neck ready for fairing


The Faired neck. I relived the veneer at the neck joint in case a luthier
needs to remove / re-set the neck in the future.


A view of the truss rod nut.


Finger board glued back on and it is perfectly level!

Frets levelled and crowned.

Frets polished.

bridge and saddle. These are very generously proportioned on a Maton.
I shaved a couple of mm off the bridge and did the same with the bone saddle.
This keeps the string break angle consistent.

Maton ERC90C Dreadnought cutaway acoustic. Looks and plays like new!

Once this guitar was re strung the string tension pulled the expected amount of belly up. Factoring in all my alterations the ideal string height was achieved for my client.

This guitar aged 10 years during its humidification ordeal. Now it is good for another 10 years at least!


Wednesday, July 3, 2019

Gibson J50, Dreadnought acoustic 1967

I recently completed a re-fret, new saddle, set up and neck refinish on this beautiful 1967 Gibson J50.

First day on the work bench. Strip down of all fittings.

The neck was suffering from a breakdown of the lacquer finish. I decided to take the minimum
intervention route. Here I'm filling in the bare patches with multiple layers of Shellac
carefully brushed in. It took more than 20 applications to reach the same film build as the
original lacquer.

Part way through the process.

Nearly done, first a re-fret 

This was the bone saddle.

The guitar had fallen on it's ear which had bent the tuner shaft and broken the plastic button.
I was able to straighten the shaft and glue the two halves of the button back on the shaft with
Loctite 406 superglue.

Frets removed. Time to sand the rosewood fingerboard and remove those fingernail divets.

Fret slots prepped.
New fret wire on the bench bent to the correct radius.


Some of the fret ends popped up so I glued and secured them by taping and clamping.

This is my home made fret caul clamp. It works a treat.

Closeup of the home made fret caul clamp the jaws are made from scraps of purple heart.

Fret levelling and crowning complete.


Last coat of true oil on the neck.


Ready to re-string.

New saddle is of Ebony made from and old black piano key. The tone is amazing.
The old girl has a new lease on life. I hope the owner likes it as much as I do!

What a stunning guitar, such a privilege to work on a guitar of this age, quality and condition.

Wednesday, May 29, 2019

Maton CW 80/6 1977 Dreadnought.


This 1977 Maton CW 80/6 is easily the the most damaged guitar that I have ever attempted to repair.
I took it on as a challenge and because I like the owner so much, besides which the back has Keith Richard's signature scrawled across it!
The owner had attempted to repair it himself but I had my work cut out just undoing his efforts before I could begin the repair. The back had come completely apart, the result of exposure to moisture. Every glue line to every single component in the back had let go. The owner had re-secured it all with PK screws.


The action was very high, the result of belly in the bridge (over 3 mm)
The owner had removed the saddle and rebated it into the soundboard! This was something I had no desire to touch.

Here is an example of a brace smothered in hot-melt glue.

Please don't attempt your own repairs if you don't know what you are doing, it makes it so much harder to repair.

The original label and model number.

Maton had driven a holdfast nail into the heel of the neck!
With the back removed I was able to punch it out from the inside.


Neck block

X bracing was loose in one spot to the left of the sound hole.

No reinforcement around home cut preamp slot and insufficient bracing for the bridge string holes.
This area had pulled upward an alarming amount.

The owner had drilled an oversize hole to accommodate the Fishman tailpiece
resulting in a stress crack in the tail block which (incidentally) has the grain running the wrong way.

I glued a wall nut veneer over the split after first glueing and mending the crack.
This reinforces the block.

I added a fillet of birch ply to the preamp slot cutaway.
I also glued a cherrywood reinforcing block under the bridge.
I cleaned up the mess on the braces and began the process of reassembly.

The two halves of the back are reconnected and the joint reinforced with wall nut battens.
the braces start to go back on.

The assembled back ready to be glued back on the body of the guitar.


I made 30 spool clamps which proved ideal for the replacement of the back.


I decided to remove the finger board as I could not understand the neck joint.
This is unique to this Guitar. There is no one at Maton that recalls how this joint should be separated.
I tried conventional methods but no luck.

The truss rod extends all the way to the sound hole while I have never seen before.

Close up of the truss rod.

Because the neck would not come off my only option was to make a long wedge under the fingerboard.
I fabricated this out of .5mm laminated of maple stepped gradually from zero at the nut to 3 mm at the sound hole.

Once cured I sanded it fair and straight.


I then re glued the finger board.


The owner wanted to retain the road worn aesthetic of the guitar so I settled on re coating it in several layers of shellac and a couple of coats of gunstock oil on the back, sides and neck to protect the bare wood. 

Reassembled with a new ebony saddle with string height and action adjusted, the intonation is perfect and it
plays like a new guitar with all the tone and character that it has accumulated over the last 44 years.