Wednesday, September 25, 2019

Maton ERC90C Dreadnought cutaway acoustic.


I wrote this message to the upset owner of this beautiful Maton ERC90C Dreadnought cutaway acoustic guitar.

"I think the guitar has been over humidified in its case which may have had some residual moisture spilled in it, or a shower of rain in the open case.

The whole guitar has been over humidified resulting in expansion of most of the timber it is made from. I did some more measurements and geometry checks and found that the bridge area is 3+mm (under string tension) higher than it should be.

I've shaved the bridge and lowered the saddle by 1.5 mm so that the string height will be close to normal again.

The neck angle is within tolerance and does not justify a neck re-set. The hairline crack around the neck joint is the result of expansion of all the exposed wood in that area.

I'm going to leave the case open in the sun for a few days to ensure it is properly dry.

I'm going to remove the fingerboard and re-fair the neck to the sound hole then reattach the fingerboard, level and crown the frets. This was done on Andy's Maton with great results and also on an early Maton of another friend, the neck of which could not be removed. 

It deserves the right treatment."

Maton ERC90C Dreadnought cutaway acoustic.
Looks good right? Unplayable neck, the result of over humidification.
There was a distinct V in the finger board where the neck joins the body.

The hairline expansion cracks can be seen here.

...and here

More expansion cracking

... and here.

There was no way the neck joint had been compromised.
These lines are the result of timber expansion and contraction


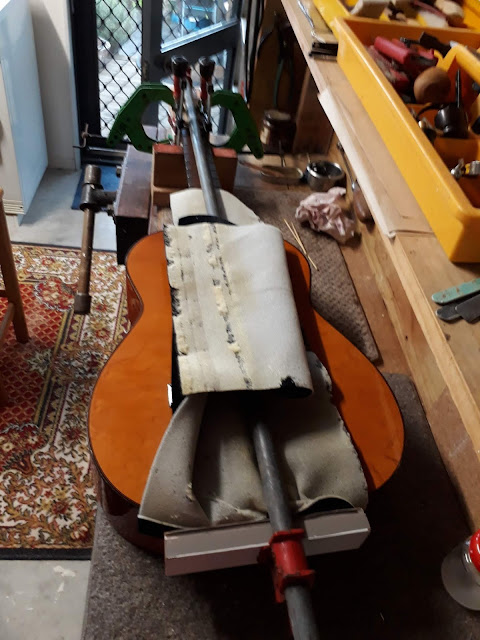
Here I'm glueing a .5mm walnut veneer to the neck and sound board to
begin the process of re-fairing the neck and body surfaces to take the finger board.


Here the veneer is ready for beam sanding.
The neck ready for fairing


The Faired neck. I relived the veneer at the neck joint in case a luthier
needs to remove / re-set the neck in the future.


A view of the truss rod nut.


Finger board glued back on and it is perfectly level!

Frets levelled and crowned.

Frets polished.

bridge and saddle. These are very generously proportioned on a Maton.
I shaved a couple of mm off the bridge and did the same with the bone saddle.
This keeps the string break angle consistent.

Maton ERC90C Dreadnought cutaway acoustic. Looks and plays like new!

Once this guitar was re strung the string tension pulled the expected amount of belly up. Factoring in all my alterations the ideal string height was achieved for my client.

This guitar aged 10 years during its humidification ordeal. Now it is good for another 10 years at least!


Wednesday, September 11, 2019

Classical guitar repair, Vincente Sanchis, model 29, made in Spain.


Yet another Peg head break that has been previously (and poorly) repaired.

I took a pair of tweezers and carefully removed all loose shards and splinters of mahogany
from the break. There was a deposit of hide glue on all the surfaces
that needed to be chipped off as well.

The neck was given the same treatment. Most of the Hide Glue was deposited on this side of the
previous repair.

This is the weekest point of the classical guitar neck. Sapele Mahogany is not particularly
strong in this application. The way the neck was cut from the balk of timber meant that the
grain ran across the weakest point

Though the label gives no details, some research on the net showed me that this is a
Classical Model 29 from the 1970's.

Work begins on the repair. There were several splits in the surface of the peg head that
needed to be glued before I could repair the main break.

I have a pine wedge that serves as a caul for the sash clamp which puts direct pressure on the
broken joint

Here you can see the sash clamp pulling the break closed.

another view of the sash clamp.

Close up of the peg head with cauls and clamps to prevent the peg head from splitting under the tension of the sash clamp.


A rear view of the new glue line.


Back in one piece.
Front view of the peg head and the ugly glue line.
I glued a piece of Burl Sapele Mahogany over the peg head to conceal the ugly glue line.

First coat of stain.

Rear view after first coat of stain.

The break is already hard to see.

3 coats of acrylic clear lacquer and tuning pegs fitted.

A reasonable result.

Guitar looks like new again.

Monday, September 9, 2019

Fender style, Tweed "Rock Case" upgrade.

First task? Select a suitable fabric.

Lots to choose from. The client eventually sent me what he wanted. He has more chose where he lives.

Next, carefully peel out the old lining. I was not going to replace this lining Like for like but I
wanted to take note of finishing details.

I was surprised by the poor quality of the build and materials on this case.
Much is concealed by the upholstery!

Out it comes.

The empty case. Now to plan the new interior.

Here are all the old components.

A visit to our local Para Rubber store turned up this grey, medium density,
Polyurethane foam.

I cut a small amount of clearance around the guitar to allow for upholstery.

I also cut a channel for the neck and a bevel around the cutaways to soften the look once the
case was upholstered in crushed velvet. I also refitted the existing accessories box and lid.
I could not see the point in altering this component.

Because the guitar could still jump around inside the case, I chose to fit a couple of blocks.
These I glued to the lid to secure the guitar into its pocket.

I lined the accessory compartment first to get a feel for the application of the crushed velvet material.

The owner and I had done some research into the traditional way in which these cases were constructed.
Hide glue and vanilla essence! not that successful (sadly). Back to the tried and tested spray glue.
I thoroughly detest using solvent based products and avoid them when I can.
Here it was wholesale solvents, 3 cans of spray glue and half a litre of Ados contact cement!

It's been gassing off for days and days and it still stinks! I'm not putting the guitar back in there
until the solvent smell has passed. The wrinkles were unavoidable in spite of the
extreme stretchiness of the fabric.

I got the pile of the fabric out of phase in this case 90 degrees. I was not happy with it so I
ripped off the lining of the accessories compartment and relined it. While I was at it I made
a nice new red leather lift tag

The smell is subsiding. I trial fitted the guitar, perfect!

The newly lined accessories compartment. Much better now. I also hand sewed
the lining for the lid which made a far tidier job of the finish.

Out in the sun to let it air some more.

I fitted a black webbing strap to support the lid hinges. This will give the case greater longevity.

Detail of my red leather lift tag.

One happy Strat and hopefully, a happy customer.